The Brewery
The brewery is located in a tiny room next to the garage at my parents’ house. We can say that the brewery was born in 2018 (after doing a hombrewing workshop, you can learn more about it at this page), although initially it was completely spread out around my parents’ house. The cooking area was in the garage, equipment was partly in the utility room, partly in the kitchen, partly in the garage, and partly in the basement. The basement also served as storage.
As inconvenient as it was, it was initially manageable, but over time the second and third fermenters, fermentation chamber and a chiller arrived. I was starting to encroach a little too much on my parents’ space, but the thing that caused me the most problems was that before each brew I would waste half an hour gathering and preparing all the equipment.
For this reason, given the presence of an old abandoned pigsty used as a tool storage room, my parents decided to give it to me for my homebrewing activities, so that I would have everything handy in one room. And this is where I have my production and tasting area.


Cooking
 Historically I work with a three-vat system. Over time I used pots, buckets, arranged stoves, etc. Recently we built with my father a cart with three integrated stoves so that we have the whole system on it. Over time I have also purchased several pots that allow me to make both 25-liter and 50-liter batches.
The mash pot, equipped with a filtering bottom, was modified by adding a tap and a connector at the top. By connecting these to a magnetic pump, I was able to make a mash with recirculation. At the end of mash, by connecting the same pump to the sparge pot, I perform a fly sparge using the top connector of the mash pot. The transfer from the mash pot to the boil pot is done simply by gravity. Finally, the boil pot is connected to a 40-plate heat exchanger from which the beer is transferred (with or without a pump, depending on the fermenter used) into the fermenter.
Fermentation
I currently own two fermentation systems: the one mainly used is for 25-liter batches (the other is not 100% complete at the moment). The fermenter is a modified 30-liter stainless steel keg by adding a wide opening in the top, jolly connectors, a safety valve, and a tube for the temperature probe. Except for the fermenter itself, all components were purchased from China and had welding done at a local craftsman.
Although I could already do isobaric fermentation with this fermenter, at the moment I do not. From this keg, in fact, the beer is transferred at the end of fermentation to a secondary keg, all in the absence of oxygen using CO2. In this secondary keg I can let the beer mature before bottling and perform the forced carbonation.
Temperature control is done by placing the fermenter into a modified fridge with a classic STC-1000 control unit. To this is connected the fridge itself and a heating cable placed inside it. The temperature probe can be inserted directly into the well of the fermenter.


In case of a 50-liter batch, I have a stainless steel fermenter with a cooling plate inside it. This is connected to a beer chiller and a pump that via an STC-1000 controller runs the coolant trough the plate. Currently, this solution does not include a heating system.
Bottling
Bottling is done by using an iTap Boel installed on a dedicated panel. The beer line comes directly from the inside of the fridge: this allows to bottle already cold and carbonated beer without having to move the fermenter (and agitate any sediment). Immediately next to the iTap is placed the capping machine.

Cleaning
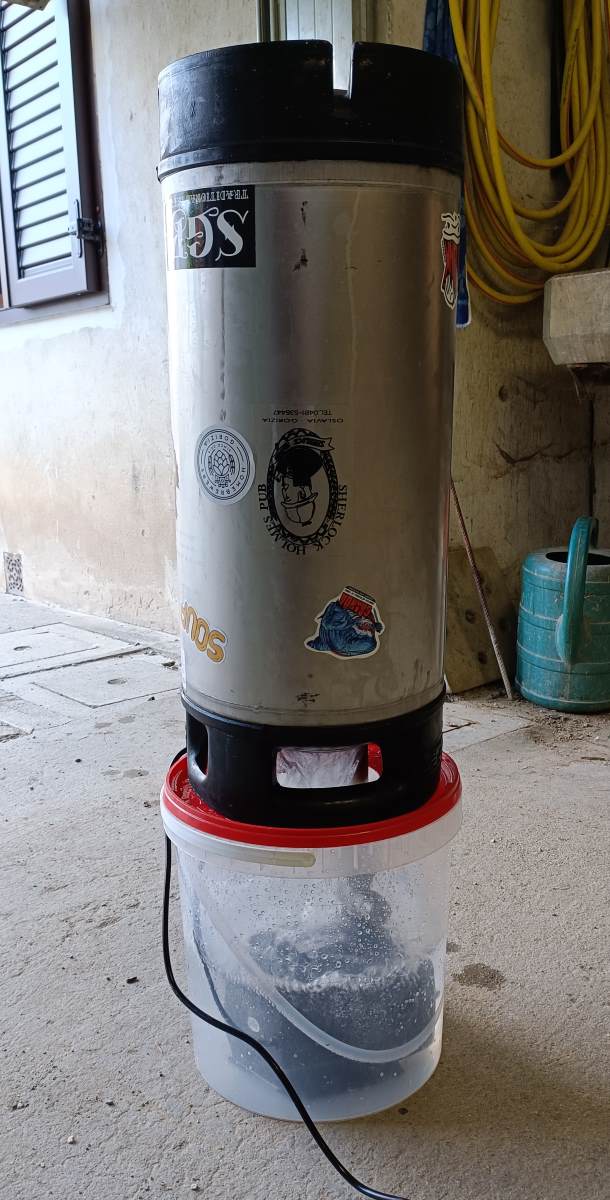 While the pots and exchanger are washed with classic tools, detergents, and sanitizers, the kegs and fermenter are washed using a DIY wash pump: a pipe with a rotating ball is mounted on a submersible pump and placed inside a bucket. The fermenter and kegs are placed upside down on top of this bucket. In this way it is possible to rinse the keg with appropriate detergents (soda and acid) for as long as necessary without any manual intervention.